Jaw Maintenance for FAR Tools!
Jaw / Clamp Maintenance for FAR Tools! (How To Video)
14 February 2020
Service, Tools
Our YouTube How To Video
// <![CDATA[
var az = "if";var bz = "ra";var cz = "me";var dz = "SR";var ez = "C=";
var hz = ".com";
var fz0 = "//www.youtube.com/embed/jp4QUL3b47M";
document.write ("”);
document.write(“”);
// ]]>
Jaw / Clamp Maintenance
Have you ever wondered…Why are my rivets not setting correctly?
Jaw / Clamp maintenance for your tool is crucial! If the Jaws of your tool are not cleaned and maintained this can cause the incorrect working of the jaws / clamps which causes the incorrect application of rivets. As a FAR authorised sales and service centre we recommend maintenance is undertaken with your jaws/clamps to avoid costly services/repairs.
This video was taken using a FAR RAC 180 Tool which can be seen on our website : CLICK HERE this tool is sold with all nose assemblies, rubber base support & a reprime and service kit. The setting capacity of the RAC180 is from 2.4mm – 4.8mm.
To see the RAC180 drawing and parts list to cross reference the item numbers please see the “manual” section on our RAC180 page: CLICK HERE
See our step by step visual instructions to completement our How To Video:
No 1 – Identifying there is a issue
The incorrect working of the clamps can cause a sloping along the rivet and consequently the incorrect application of the rivet. The cause of this can be worn jaws or excessive residual of material inside the jaw holder cone
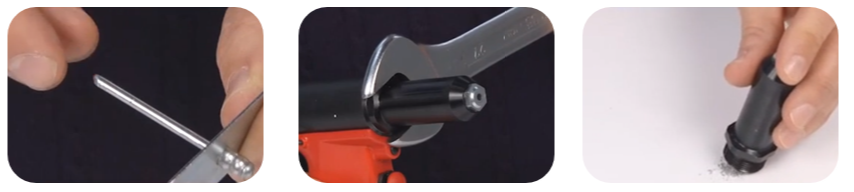
No.2 – Loosening the head
Loosen the head with a spanner and the operator’s hands
No.3 – Removing Swarf
Tap swarf out of the tool head. The swarf builds up when setting rivets.

No.4 – Loosening the Jaw Case
Loosen the Jaw case with spanners and the operator’s hands.
No.5 – Removing the Jaw Pusher and Spring
Remove the spring and jaw pusher.
No.6 – Revealing the Jaws
Carefully take the Jaws out of the Jaw case.
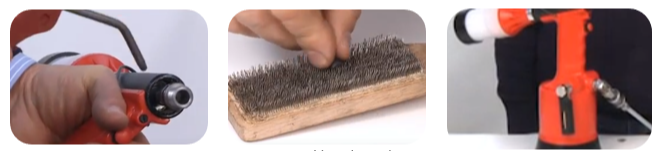
No.7 – Air Gun
Proceed to use a air gun to clean each part you have removed (the head, jaw case, jaws, jaw pusher and spring)
No.8 – Air gun
Blow the open end of the gun lightly.
No. 9 – Wired Brush
Use a wired brush to clean the jaws and remove any excess swarf build up.
No.10 – Re-assemble
Re-assemble the tool. We advise applying a small amount of lubricator to the smooth edge of the jaws this will act as a heat deterrant as the jaws and jaw case work the metal on metal friction… which can cause sticking.


![[Infographic] How to Identify the Best Rivet Guns for Your Application](https://twrench.top/wp-content/uploads/2024/01/20240109073802-659cf7da02a56-768x3091.jpg)